Monday 30 November 2015

Clarity Clean and Simple

A bit last minute again!  The following is my entry to this months CAS challenge.  The pine ridge stamp was stamped across the circular aperture then the flat card behind the aperture was stamped and trimmed to match the positioning of the outer picture.  I was pleased how the moon shading worked out.

Monday 26 October 2015

Clarity Stencil challenge Oct2015

The challenge this month had me digging through my Clarity stencils, and returning to my favourite one the chrysanthemum flower, I'm not sure if it is still available?  I dry embossed with a 2mm embossing tool then used cut n dry to highlight the embossed edges.  Placing the stencil back over the same flower, I used brushes to fill in the flower.  The splitting of the flower horizontally adds to the drama/impact.  Autumn leave in the same colours as the flower adds balance.  The use if with love sentiment provides versatility for the card us, and even allows it to be hung.

Saturday 3 October 2015

Gorjuss girl

I made this card from the Gorjuss range of stamps, this one is called the White Rabbit.  The colouring is an early use of the Spectrum Noir pencils, still a lot to learn!  I gave this too my Niece who has just started Uni, and the sentiment "Happy everything" seemed very appropriate!


HobbyArt Spitfire card

This card was made as a retirement card for someone leaving the aircraft company I work for.  The Logo on the main sentiment is our company logo, and was made using rubber off cuts from a stamp set.  The wood effect was a crafters companion embossing folder.  The clocks and sentiment are by PaperArtsy.

Friday 31 July 2015

Clarity Christmas Trees

Well it has been quite a while since my last post!  Today's posting is in response to the Clarity "Anything Goes" challenge. 

A number of Clarity Stamps were used : Forest Ridge, Winter Trees, Happy Words and the squirrel from the Birdhouse set.

Prep ahead - used a tumble drier sheet, as it was intended in the drier!  Use twice to leave a fine gauze.

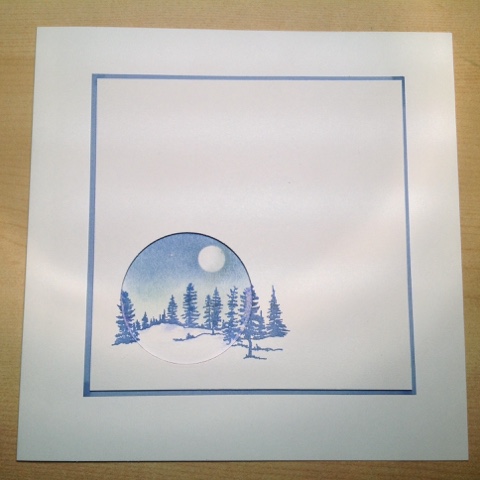
First the background was created - the blue of the sky and the shadows from the trees, were slightly darker than I would normally have done, however the covering brings down the colour, so it is a good idea.  In this case going against Barbara Gray's mantra of "you can always add colour, but you can't take it away"!

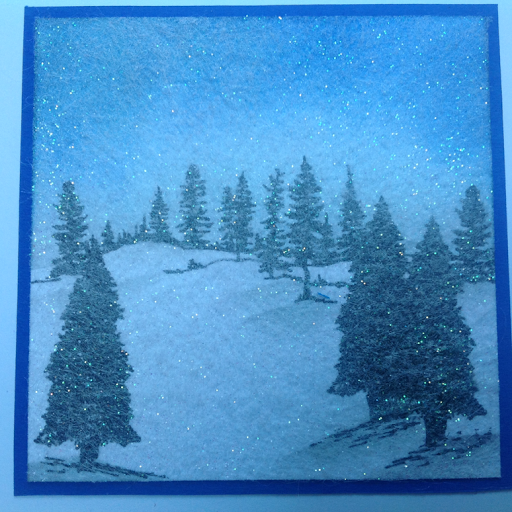
Make sure you get your glitter ready as it needs to go on the wet glue, I used a white glitter, with a hint of iridescent.  Spray glue all over the background ( I used Crafters Companion Stick and Stay), stick the drier sheet to cover the whole background, excess can be trimmed off later.  Then sprinkle the glitter over the drier sheet, pat down the glitter, then tap off the excess. From the amount that goes back in the tube very little glitter is used, but the look is a slightly hazy snowy scene.

This is my first attempt at this technique and I shall be using it again!

Wednesday 20 May 2015

Make a wish - dandelion clock

I've not blogged for quite a while; I follow the Clarity challenge and have mainly just posted to enter this challenge.  Unfortunately the challenges have not been suitable for the Clarity stamps I own.  This months challenge of "Clocks" had me in the same predicament, then I had a flash of inspiration that the seed heads of dandelions are called Clocks!  (This also lead to the revelation that my husband refers to them as suger plum fairies!?!!)
The Clarity letterbox stamps are easily recognisable, but did you spot that the dandelion was the allium stamp?  I masked off part of the stamp, where the seeds had been blown from, then drew the additional lines on the "blob" on each allium flower head, with a micron pen.  The floating seed heads were then drawn, following the same shape as the "allium dandelion".

I have been getting more adventurous with my Scanncut, so watch this space, as I will be posting some examples soon.


Friday 27 February 2015

Clarity Poppies

This is my entry for the Clarity Stamp Challenge for Feb2015.  The theme is "Floral" http://claritystampchallenge.blogspot.co.uk

Inspired by a Clarity Workshop, where stamps were used to provide the artistic technique Pointillism.  First the lovely Clarity Poppy stamp was stamped in a sepia colour.  Then it was a case of many, many dots of  Promakers to build-up the shading.  

The background was created by masking using Washi tape whilst randomly stamping the Clarity leaves, and using a brush to create the "airbrushed" background, tip, make sure you remove some of the stickiness, so that you don't take the card surface off!   How do I know?   ..... Notice the Clarity " Happy Birthday" strategically placed across the corner!

For a close-up of the poppy:

Saturday 31 January 2015

Clarity challenge - things with wings

This is my post for the Clarity Challenge "Things with wings".

I have been away from crafts for a while, with the busy Christmas period and a move to a dedicated craft room!

This card was created using the Clarity chrysanthemum stencil, over which I rubbed a watercolour pencil against some sand paper, then spritzed it with water.  This was a bit of an experiment and the colours ran due to the water resting on the card and running under the stencil slightly (the card stock was quite non-porus).  To recover the piece, when it was dry, I used the corresponding pencil to outline each petal, to give definition to each petal.

The dragonfly is one of my oldest Clarity stamps, which was bought for me by my Mum, along with a couple of other Clarity stamps and a VHS video of Barbara!  I have been hooked on the wonderful Clarity products ever since!  The dragonfly was stamped in black, but I thought it looked too harsh with the flower; along came my newly acquired "Glossy ascents" for the wings, still too harsh, so had the idea of adding irredesent glitter to the wings.  Quite pleased with the combination of accidents and experiments, this really is the joy of crafting, not always following a plan from start to finish!